
How to use the Smart View Diagnostics tool
The Smart View Diagnostic tool is an invaluable piece of your troubleshooting abilities. It allows the end user the ability to easily gather the necessary technical information to assist in solving difficult Smart View issues which might arise. Once the information is obtained, it can then be sent to Oracle Technical Support for further analysis and hopefully lead to quick response and solution.The Smart View Diagnostic Tool is a newer addition to Smart View release 11.1.2.3+ product line. As each new version of Smart View is released, the abilities of the diagnostics tool often enhanced. Consult your Smart View product ReadMe for more details on each version's actual use of this feature. For this article, we are demonstrating its usage with relate 11.1.2.5.520 Smart View.You will first need to find and display the Diagnostics tools. To perform this function, once in Smart View, select “options.” Then under Advanced > Logging, check the box “Show Diagnostic group on Smart View ribbon” and click OK.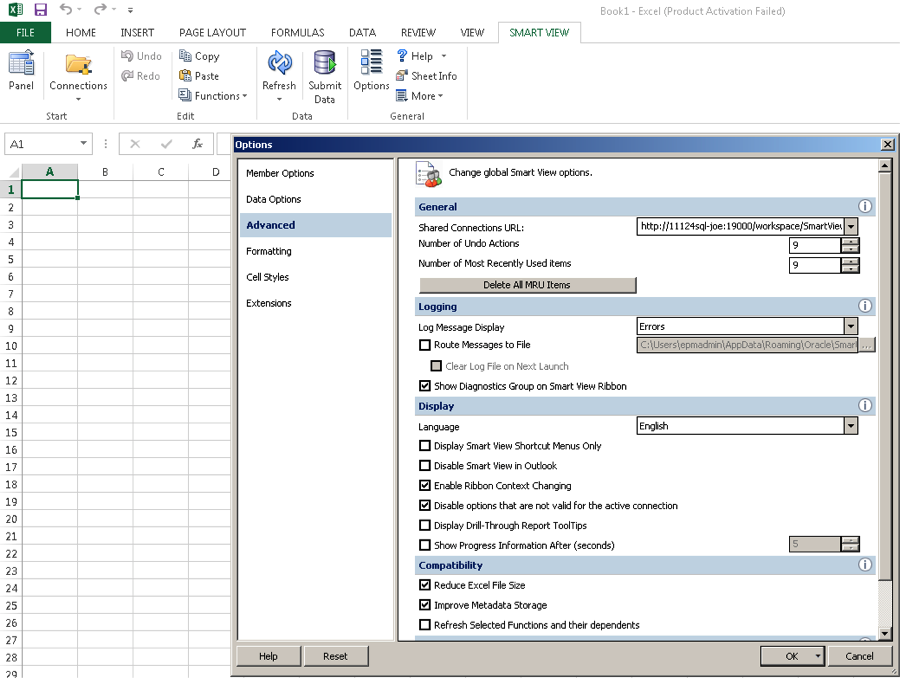 The Diagnostic tools will then be available in the menu ribbon as seen below.
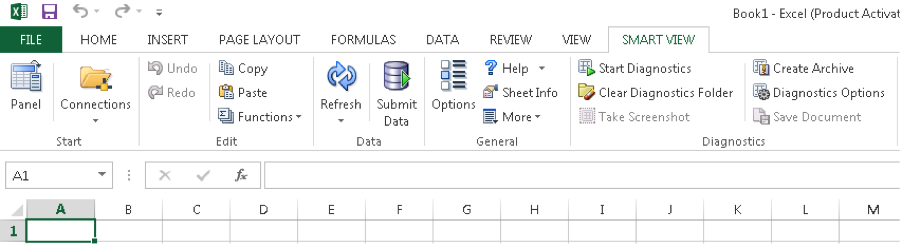 Your next step will be to left click on the “Start Diagnostics” option in the menu. You will be prompted to restart Office. This is highly recommended by Oracle because it allows for all the actions involved in a particular issue to be recorded from the very beginning. It is better to give them too much information rather than too little. At this point, click OK and restart Office.
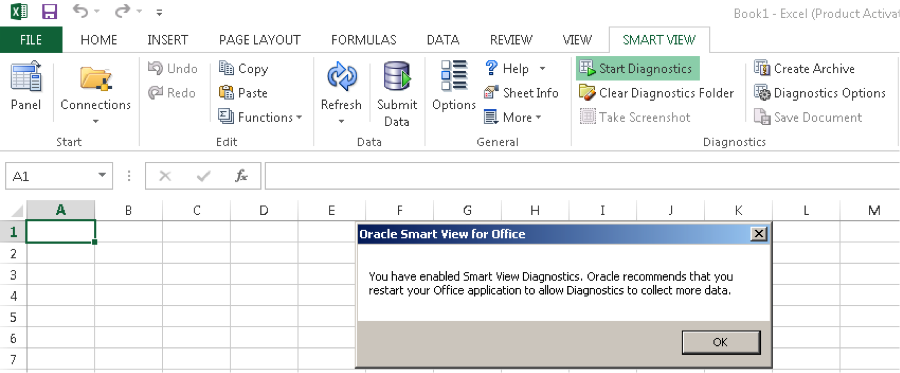 Now, you will see that when you restart Office, the option has changed to “Stop Diagnostics.”
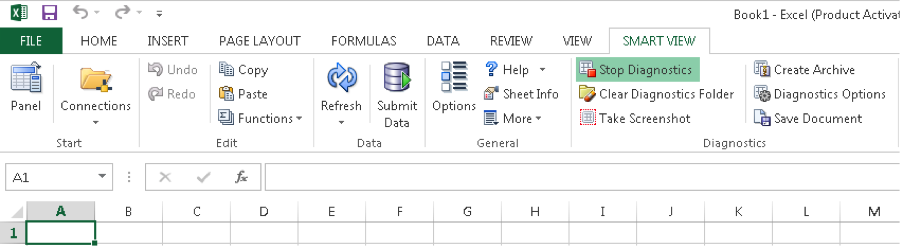 You can use the “Take Screenshot” Option at various important points during your session. Simply click “Take Snapshot.” Something to keep in mind when taking snapshots is that it takes a picture of your entire screen not just Smartview itself. Any open applications not pertaining to your issue will be captured.The next option is “Save Document.” This should be used a few times during the diagnostic process to provide more information about your issue to Oracle. Each time the document is saved it will add a different suffix to the saved file. This prevents overwriting.The files are saved each time to a current diagnostics session folder (see example below). This setting can be adjusted within the Smart View options menu:C:Usersusername.domainAppDataRoamingOracleSmartViewDiagnosticsThis is a sample screen capture of the path to the folder and what you might expect to find there.
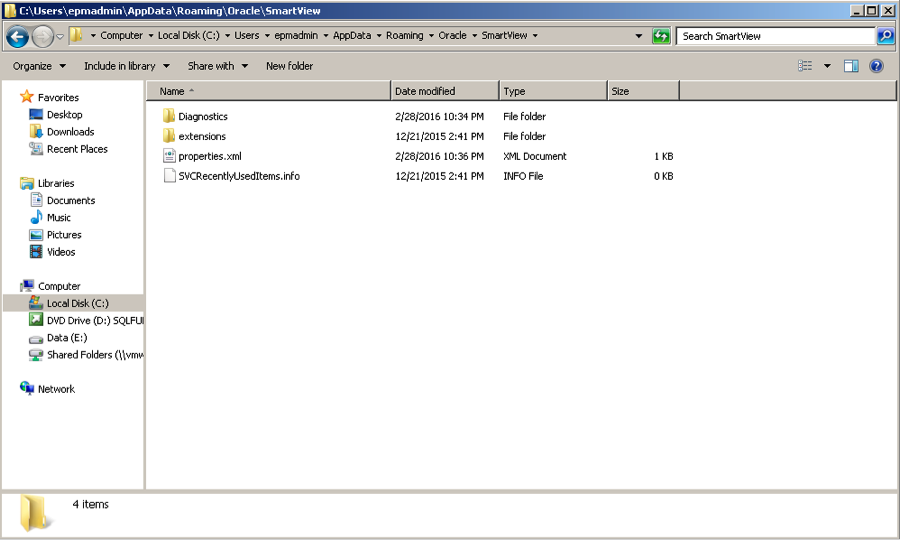 When you have successfully demonstrated the issue at hand, you can now create an archive. The Create Archive dialog box will be displayed when you select “Create Archive.” C:UsersepmadminDocumentsSmartView_Diagnostics_2822016
 This is an example of the path and location of the Archived file.Below is the standard name given to the file by default.SmartView_Diagnostics_ddmmyyyy.zip
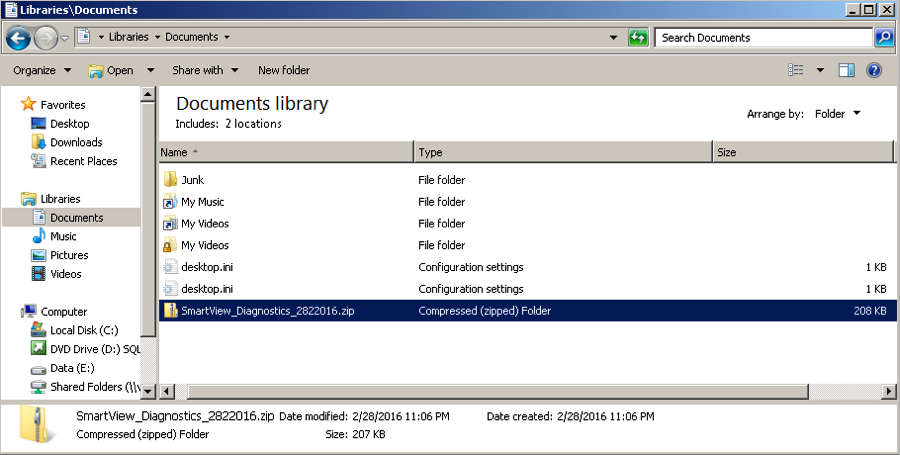 This diagnostic zip file is what Oracle wants to see. Make sure to add this file to your Service Request.There is the ability to clean up your files after sending your information to Oracle. If you still have the diagnostic tool running then you can click “Clear Diagnostics Folder.” This will clear all diagnostic sessions except for the one you are currently running. When you click “Clear Diagnostic Folders” this dialog box will be displayed.
 By using the “Stop Diagnostics” option and then closing all office applications, you can now restart Smart View. Now open any Office application and use the “Clear Diagnostics Folder” to clear all diagnostic sessions including your most recently opened one. APPLICABLE VERSIONS: 11.1.2.0, 11.1.2.1, 11.1.2.2, 11.1.2.3, 11.1.2.4 We at iArch Solutions hope you found this blog helpful. Is there a question you want answered in a blog? Send us your questions at info@iarchsolutions.com.