
OWSM Blog Part 3 – Installation and Configuration of DRM Web Services API with Oracle EPM 11.2
Many of the guides for setting up DRM Web Services API deal with configuration of older versions of WebLogic than what comes with Oracle EPM 11.2 . The EPM 11.2 documentation ‘Deployment Options Guide’ is a fine document but has no screen shots. The other DRM documents out there either say ‘look at these other documents’ (many of which were not yet updated to show WebLogic 12c navigation) or are written for the WebLogic 11 server menus. This document generally follows the Oracle EPM 11.2 DOG.
Part 3, Pass-through Configuration and Testing
In Part 1, we showed the installation configuration and deployment of OWSM to the Foundation Services server. In Part 2, we showed how to get the DRM Webservices API up and running, also on the Foundation Services server.
Continuing the series, we will create and provision a user for connecting to DRM API, as well as test the pass-through functionality of the API. This guide assumes you have already set up your DRM application and Hyperion’s Foundation Services and WebLogic Admin Server console are running.
We will begin by ensuring your Shared Services has the required roles for DRM by running drm_roles_oracle.sql (or equivalent if using MSSQL) against the Shared Services database schema. The scripts may be found in your product’s $EPM_ORACLE_HOME\products\DataRelationshipManagement\server\config directory.
Execute the script and commit the changes to the schema.
Next, add the pass-through user to WebLogic. The idea in our implementation is that a product (BPM in our case) will pass credentials through a SOAP to WebLogic, Shared Services and DRM. This requires a user be created with the same credentials in each of those three products.
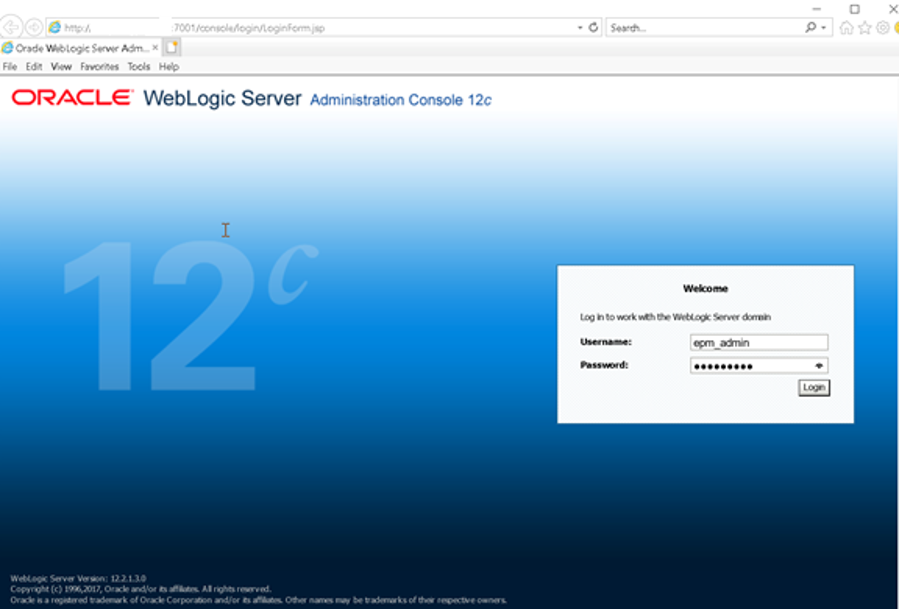
In your browser, navigate to your WebLogic Console at :7001/console, log in with your ‘epm_admin’ username and password.
Navigate Security Realms > myrealm > Users and Groups

Click ‘New’Name: proddrmbpm – whatever you want your account named is fine
Provider: DefaultAuthenticator
Password: <Not included in this documentation>
Confirm Password: <Not included in this documentation>

Click ‘OK’
Click new user ‘proddrmbpm’ in the Users list
Click on the ‘Groups’ tab
Select ‘Administrators’ from the left column
Click the single right-pointing blue arrow
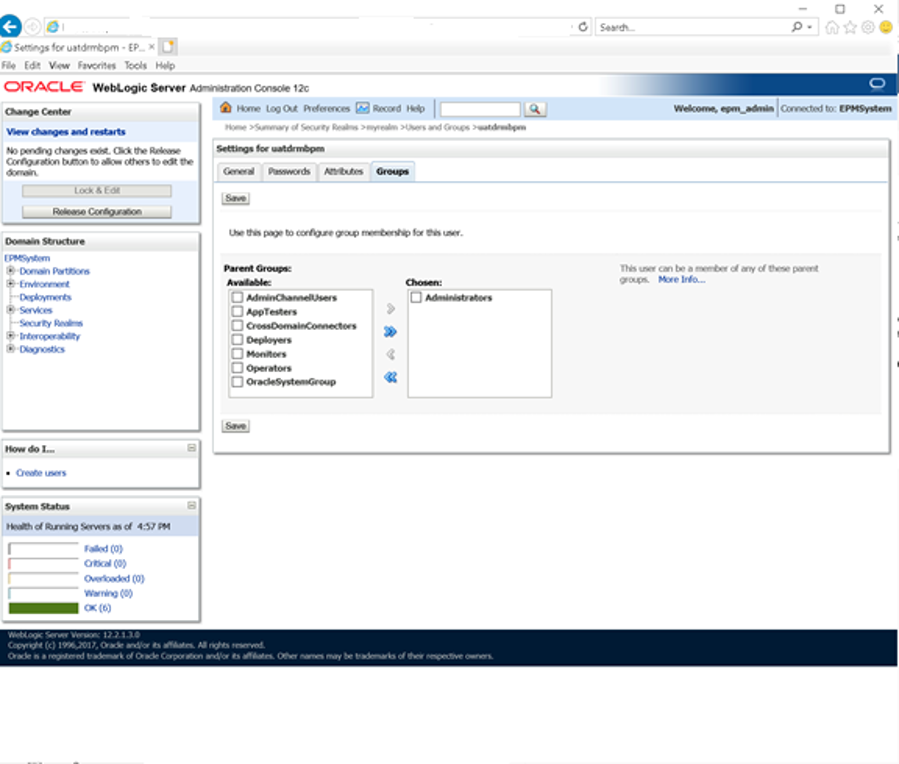
Click ‘Save’
Now, we create the Shared Services Native User.
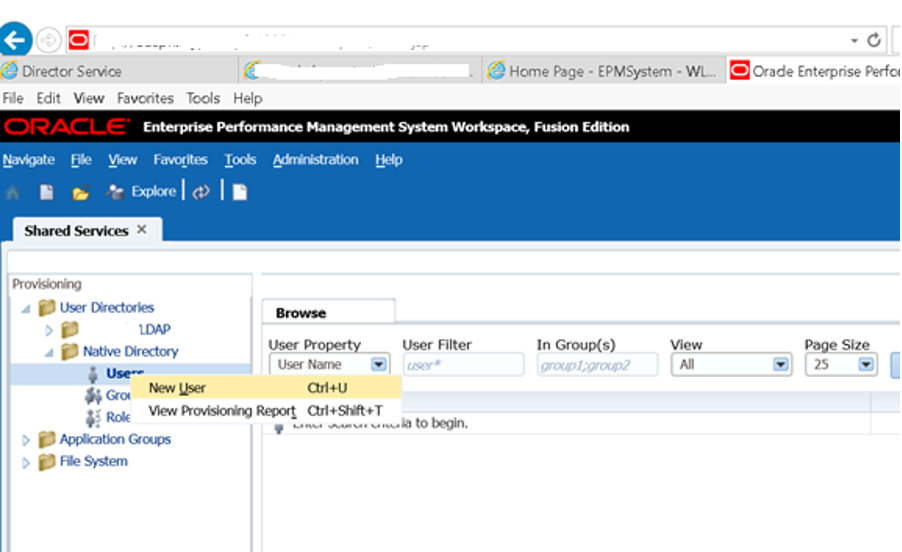
Log in to EPM Workspace as a user with Admin rights
Navigate > Administer > Shared Services ConsoleExpand User Directories > Native Directory
Right-click ‘Users’ and select ‘New User’
User Name: proddrmbpm – must be the same as the one you created in the WebLogic step!
Password: <Not included in this documentation> - ALSO MUST BE THE SAME!
Confirm Password: <Not included in this documentation>
Click ‘Finish’ – No provisioning is necessary
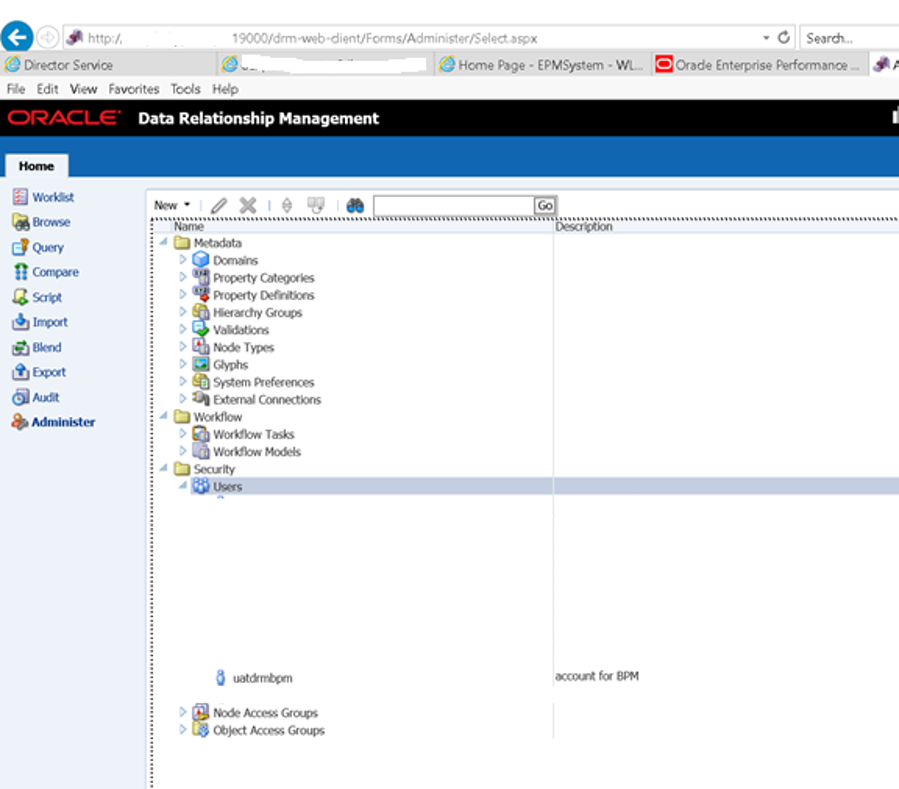
Finally, we add the user to the DRM application security.Log in to DRM Web Client as an Administrator user
Navigate to Administer > Security > Users (existing names redacted to protect the innocent)
Click ‘New’ from the drop-down menu and select ‘User’

User Name: proddrmbpm
Full Name: proddrmbpm
Under Authentication, select ‘CSS (External)’ – We assume you have configured DRM to connect to HSS in a previous step?Check Option ‘Password does not expire’

Click the ‘Roles’ tab and select ‘Data Manager’ from left side and move it to right column with the single right-facing arrow

Click ‘Node Access Groups’ tab and select the following:
Custom.Account Hierarchy Read Only Group
Custom.HFM Read Only Group
Custom.Entity Hierarchy Read Only Group
Custom.Other Hierarchies Read Only Group
Custom.Market Hierarchy Read Only Group
Custom.Org Hierarchy Add Access Group
Custom.Org Hierarchy Read Only Group
Custom.Product Hierarchy Read Only Group
NOTE: Your actual permission requirements may be different. This is unique to the example environment I tested these steps against! Use the right-facing single arrow to bring these to the right column.

Click ‘Property Categories’ tab and ensure all items are moved to the right column EXCEPT ‘Shared Info’

Click the ‘Save’ icon at the top left

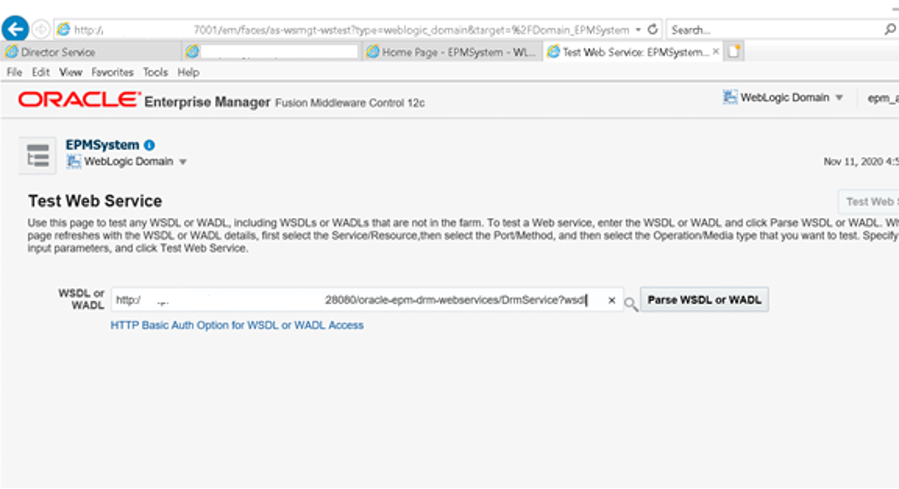
Open Oracle Enterprise Manager Fusion Middleware Control 12c: http://yourWLservername:7001/em and log in as an admin user.Using the left-side drop down for WebLogic Domain, select Web Services > Test Web Service

Enter the URL to be tested. In our case, since we deployed the DRM API to the FoundationServices0 server, we would use something like: http://Foundation0ServernameHere:28080/oracle-epm-drm-webservices/DrmService?wsdl
Click ‘Parse WSDL or WADL’
For this activity, we will need to pick a test option from the list as pictured below. We use getSysPrefs for our test. If the pass-through is working properly, the SOAP string will get us the results we are looking for. One caution – the list below appears to be in a random order each time we open it, so be warned, you will have to search carefully to find the option you need!
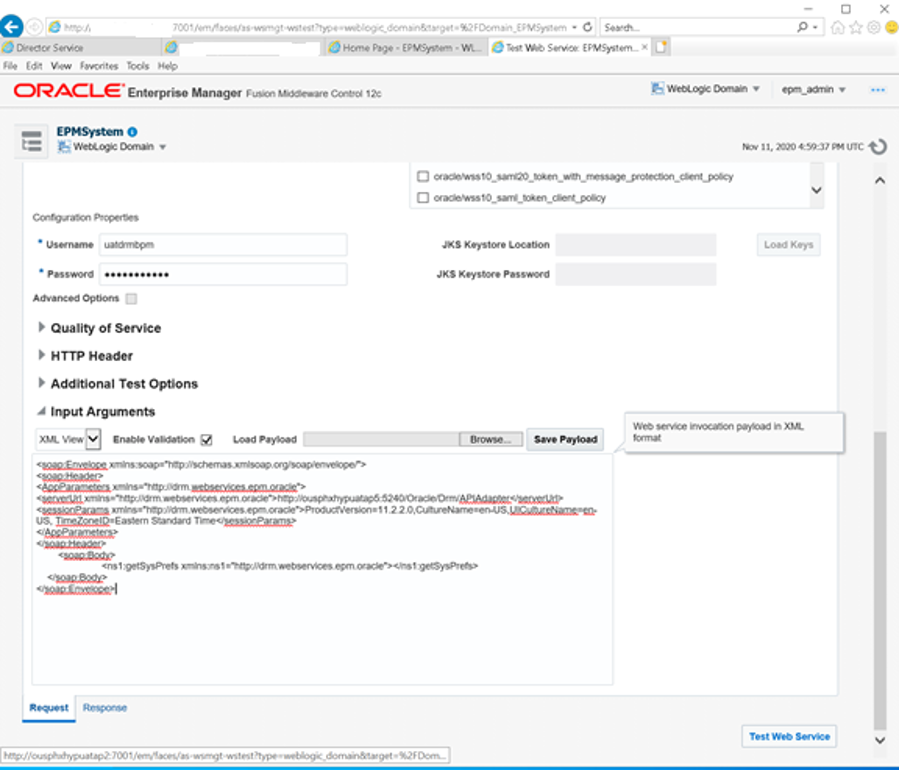
From the Operation drop-down, select ‘getSysPrefs’ from the list

On the Request tab, under Security, select the security option ‘OWSM Security Policies’
Select the policy ‘oracle/wss_username_token_client_policy’ and check the box to the left of it

Enter the DRM batch account that was created in DRM, HSS and WebLogic
Username: proddrmbpm
Password: <Not included in this documentation>
In the Input Arguments section, select ‘XML View’ from the drop-down and check the ‘Enable Validation’ box
In the text field below, remove the existing text and add the following:
<soap:Envelope xmlns:soap="http://schemas.xmlsoap.org/soap/envelope/">
<soap:Header>
<AppParameters xmlns="http://drm.webservices.epm.oracle"><serverUrl xmlns="http://drm.webservices.epm.oracle">http://ousashhypprdap8:5240/Oracle/Drm/APIAdapter</serverUrl>
<sessionParams xmlns="http://drm.webservices.epm.oracle">ProductVersion=11.2.2.0,CultureName=en-US,UICultureName=en-US, TimeZoneID=Eastern Standard Time</sessionParams>
</AppParameters>
</soap:Header>
<soap:Body>
<ns1:getSysPrefs xmlns:ns1="http://drm.webservices.epm.oracle"></ns1:getSysPrefs>
</soap:Body>
</soap:Envelope>
Click ‘Test Web Service’
If successful, the Response tab will show ‘Test Status Request successfully received’

You can see the response with the information is displayed in the Response tab, which you can then copy/paste into a text viewer of your choice to review.
Further application of the DRM API is out of the scope of this series, as this is focused on showing the ‘new’ Oracle WebLogic 12c screens. Please remember to follow your Oracle Documentation for DRM API as well, and use this series’ screenshots as a reference as needed. Thank you for reading! If you found this series useful, please feel free to drop a comment below.